7 Easy Pottery Techniques for Beginners
A beginner-friendly guide to seven pottery techniques, from pinch pots and coils to wheel throwing, sgraffito, and texture, with practical tips for safe, steady progress.
Beginning pottery gets easier when you stop trying to make a perfect mug on day one. Clay has its own pace. It dries, sags, cracks, sticks, and remembers where you pressed too hard. Simple projects teach those lessons faster than complicated pieces.
The seven techniques below give you a practical path into pottery without turning your first week into a shopping list. Some use only your hands. Some need basic tools or a studio wheel. All of them teach skills you will keep using later, from judging wall thickness to joining clay securely. If you are still sorting out clay types and studio options, start with this guide to pottery for beginners, then come back and choose one technique to try.
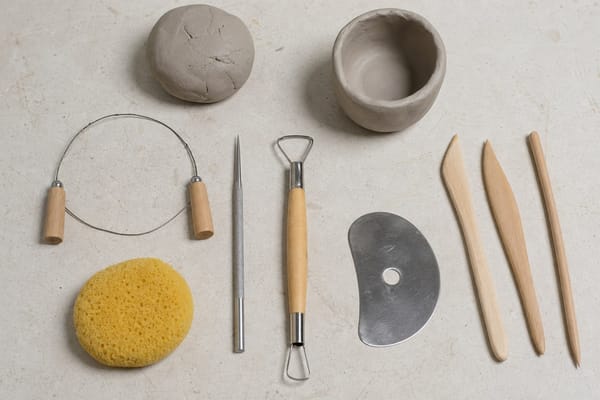
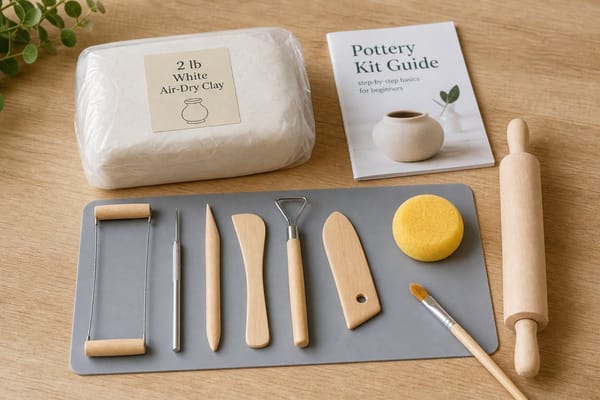
These beginner techniques build control over wall thickness, joins, drying, and timing, so a small set of dependable tools is enough at first. Pair this with a beginner pottery tool kit before buying larger sets.
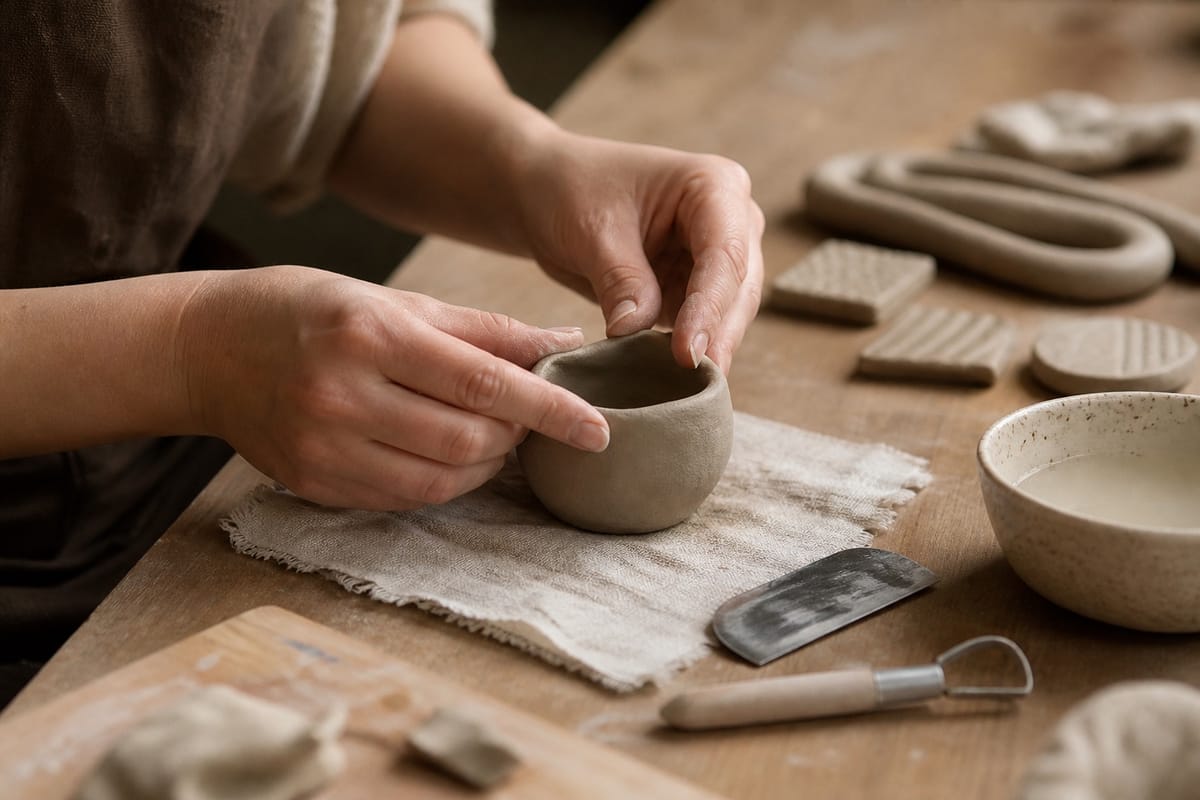
1. Pinch pots
Pinch pots are the most direct way to learn how clay responds to pressure. Roll a smooth ball of clay, press your thumb into the center, then pinch the wall between your thumb and fingers while turning the piece a little at a time. Work slowly. If one area feels thinner than the rest, leave it alone and move to a thicker section.
This technique is ideal for small bowls, trinket dishes, and tiny planters. It also teaches a lesson beginners often miss: even thickness matters more than perfect symmetry. A slightly uneven bowl with a steady wall is a better learning piece than a round bowl with a paper-thin base.
Keep the rim compressed and smooth as you work. If the clay starts to crack at the edge, it may be drying too fast. A damp sponge can help, but avoid soaking the pot. Too much water weakens the clay and makes the surface harder to control.
2. Coil building
Coil building uses long ropes of clay to build height. Roll each coil with both hands on a clean surface, aiming for an even thickness from end to end. Stack the coils, then join each layer by scoring the surfaces, adding slip, pressing them together, and smoothing the seam.
Coils are useful for vases, taller vessels, organic shapes, and sculptural pots. They let you build forms that would be difficult to pinch from one ball of clay. The main lesson is patience. If you stack wet coils too quickly, the lower walls can slump under the weight. Let the clay firm up when it needs a pause.
Strong joins matter. A seam that looks fine while wet can open during drying or firing if the layers were only pressed together lightly. Score and slip every structural join, then smooth both the inside and outside when you can reach them.
3. Slab building
Slab building starts with flat sheets of clay. Roll the clay with a rolling pin and guide sticks so the slab stays even, then cut panels from a paper template or a ruler-marked design. Once the slabs are firm enough to lift without stretching, score and slip the edges and assemble them.
This is a good technique for boxes, trays, tiles, planters, and slab-built mugs. It is also one of the best ways to learn clean construction. Straight edges show every rushed join, which is useful feedback.
Do not assemble slabs while they are floppy. Let them reach a soft leather-hard stage so they can hold their shape. Compress the surface with a rib before cutting, especially for larger tiles or trays, because compression helps reduce warping. A few basic tools make slab work much easier; if you are building a starter kit, see these pottery tools for beginners.
4. Wheel throwing
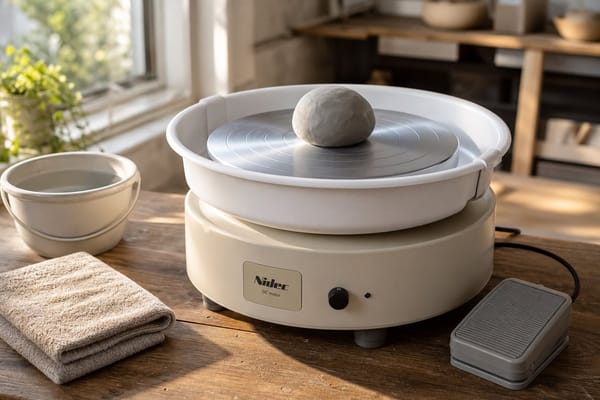
Wheel throwing is the technique many people picture first: clay spinning on a wheel, hands shaping it into a bowl, cup, or vase. It is satisfying, but control takes coordination. Centering the clay is usually the first real hurdle.
Start small. A modest ball of clay is easier to center than a large one, and a simple cylinder teaches more than an ambitious vase. Once the clay is centered, open the middle, leave enough clay in the base, and pull the walls upward with steady pressure. If the rim starts to wobble, slow down and compress it before continuing.
Use water carefully. Water reduces friction, but too much turns the surface weak and slippery. Beginners often make walls too thin too early, cut through the bottom, or keep pulling after the clay is tired. If you are deciding whether a wheel belongs in your first setup, compare the tradeoffs in this guide to pottery wheel vs hand-building.
5. Incising
Incising means carving lines into the clay surface. It works best when the clay is firm enough to hold detail but still soft enough to cut cleanly. A needle tool, small loop tool, wooden skewer, or homemade texture tool can all work, as long as the edge is controlled and safe to handle.
Use incising for borders, simple drawings, geometric patterns, labels, and small details on hand-built or wheel-thrown pieces. Keep your first designs simple. Deep cuts can weaken a wall, especially on cups and bowls, so aim for clear surface lines rather than heavy gouges.
Clean loose crumbs with a soft brush or barely damp sponge after the clay firms up a little. Do not sand dry clay indoors. Dry clay dust is not something to breathe, so keep cleanup damp and ventilated, and follow the rules of your studio.
6. Sgraffito
Sgraffito is a decorating method where you apply slip or underglaze to the clay surface, let it set, and scratch through that layer to reveal the clay beneath. The contrast can be crisp and graphic, which makes it good for patterns, illustrations, and bold decoration.
The timing is the hard part. If the surface is too wet, your tool drags through the slip and leaves ragged lines. If it is too dry, the clay may chip. Test a small hidden area before committing to the whole design. A sharp tool gives cleaner marks, but sharp tools need careful handling.
Sgraffito pairs well with simple forms. A plain pinch pot or slab tile can become much more interesting with a limited pattern. If color is your main interest, you may also like these pottery painting ideas and paint options.
7. Stamping and texture
Stamping and texture are easy ways to make a simple form feel finished. Press stamps, lace, leaves, shells, fabric, rollers, or carved clay tools into the surface before firing. Use enough pressure to leave a mark, but not so much that you bend the pot out of shape.
This technique works especially well on tiles, planters, slab mugs, trays, and small bowls. Try testing textures on a scrap slab first. Some materials stick to wet clay, and some patterns disappear under glaze. A test tile saves guessing.
Think about function before covering everything in texture. A rough exterior may feel good on a planter but uncomfortable on a mug. Deep texture inside a bowl can be harder to clean. For pieces meant for food or drink, pottery is food-safe only after the right clay, glaze, and firing have worked together. Decorative acrylic paint or an unknown coating is not a substitute for a food-safe ceramic surface.
Practical tips before you start
Keep your first projects small. Small bowls, tiles, test cups, and texture samples dry more evenly and teach faster than a large vase. Cover unused clay so it does not dry out, and wrap unfinished pieces if you need to return to them later.
Dry slowly and evenly. Fast drying is one of the easiest ways to crack beginner work, especially where thick and thin areas meet. Handles, feet, coils, and slab corners need extra attention because they dry at different speeds. If you join clay, score and slip it, then give the join time to firm up before stressing it.
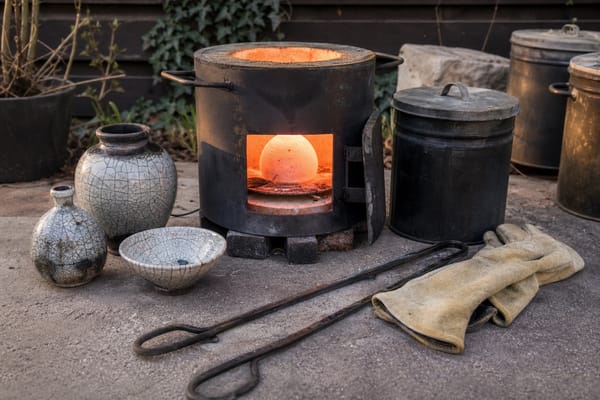
Firing is not a casual home experiment. Clay and glaze need the right temperature, kiln schedule, and ventilation. Ask a studio, teacher, or kiln owner what is appropriate for the clay you are using. For a broader overview, read this guide to pottery firing techniques. You can also learn how shaping, drying, firing, and glazing fit together in this explanation of how pottery is made.
Which technique should you try first?
Start with the technique that matches your setup. At home with a table and a small amount of clay, choose pinch pots, coils, or slabs. In a class with a wheel, try throwing, but expect the first sessions to be about centering and cylinders rather than finished dinnerware.
A good beginner sequence is simple: make a pinch pot to learn pressure, a coil pot to learn joining, a slab tile to learn compression, and a few decorated test pieces to learn timing. Then repeat the one that felt most interesting. Repetition is not a delay in pottery. It is how your hands learn what the clay is telling you.