Pottery Wheel vs. Hand-Building: Pros and Cons for Beginners
Compare pottery wheel throwing and hand building for beginners, including cost, learning curve, tools, control, and which method fits your first projects.
Choosing between a pottery wheel and hand-building is one of the first big decisions many beginners face. The good news is that neither choice is wrong. Wheel throwing and hand-building both use the same basic material, clay, but they feel very different in practice. One is centered around rhythm, repetition, and round forms. The other is slower, more direct, and easier to start with simple tools.
If you are completely new to clay, it may help to first read Your Guide to Pottery for Beginners so you understand the basic steps of making, drying, firing, and glazing. This guide focuses on the practical choice: should you start with the wheel, start by hand, or try both?
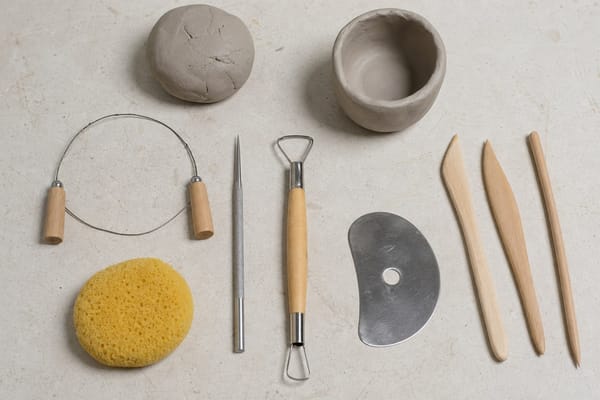
Hand-building is usually the lower-cost entry point, but both hand-building and wheel throwing still need a few basics for cutting, smoothing, trimming, and cleanup. The basic pottery tools for beginners guide keeps that first kit small and practical.
Quick comparison: pottery wheel vs. hand-building
- Best for round forms: The pottery wheel is usually better for bowls, cylinders, mugs, small vases, and matching sets.
- Best for low-cost practice: Hand-building is usually easier and cheaper to start because you need fewer tools.
- Learning curve: Wheel throwing can feel harder at first because centering clay takes practice. Hand-building is more forgiving early on.
- Space and mess: Both can be messy, but a wheel needs more dedicated space, water management, and cleanup.
- Creative flexibility: Hand-building is better for sculptural, textured, square, flat, or irregular forms.
- Production speed: Once you have the skill, the wheel can be faster for making multiples of similar pieces.
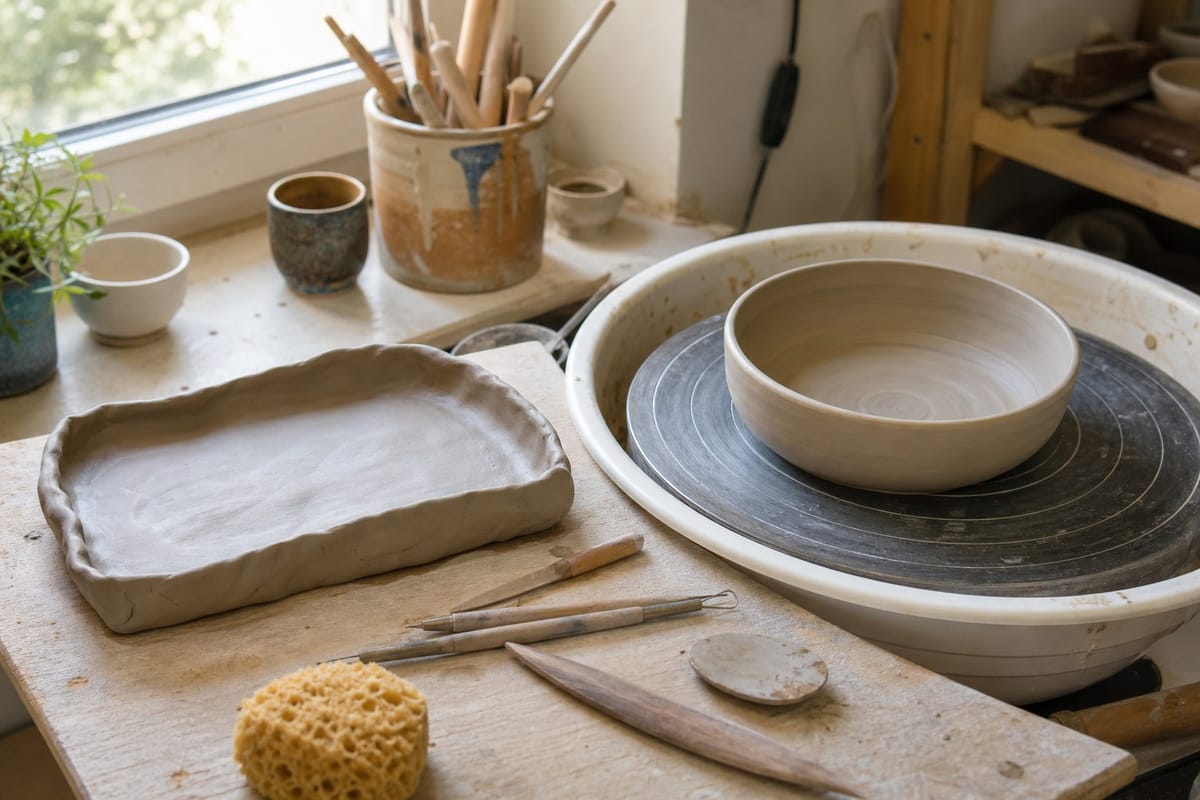
What wheel throwing is like for a beginner
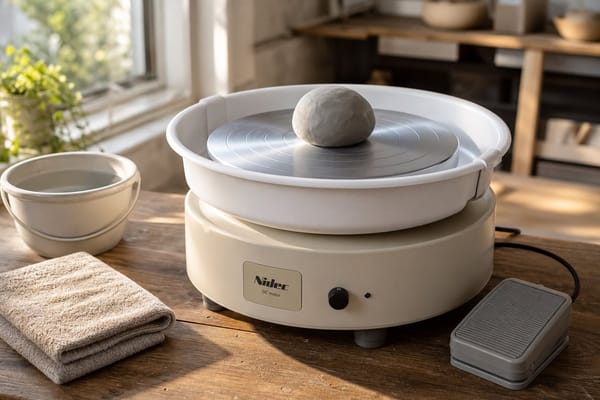
Wheel throwing means shaping clay while it spins on a pottery wheel. You place a lump of clay on the wheel head, center it, open it, pull the walls upward, shape the form, then trim it later when it is leather-hard. It is the method many people picture when they think of pottery.
The wheel is satisfying, but beginners should know that the first few sessions are often about learning control rather than making perfect pots. Centering clay can be frustrating because small changes in hand position, pressure, water, and wheel speed make a big difference. A wobbly lump of clay is normal at first.
Pros of starting on the wheel
- Great for functional pottery: The wheel is useful for bowls, cups, mugs, planters, small jars, and vases.
- Good for symmetry: The spinning motion helps create round, balanced shapes once you learn the basics.
- Efficient with practice: After the learning stage, you can make several similar forms in one session.
- Clear skill progression: You can track improvement as your cylinders get taller, your walls get thinner, and your forms become more even.
Cons of starting on the wheel
- Higher startup cost: A wheel is the biggest expense if you want to work at home.
- More equipment: You need the wheel, a sturdy seat, water, bats or a way to remove pieces, trimming tools, and a cleanup plan.
- Steeper early learning curve: Centering and pulling walls can take repeated practice before the results feel useful.
- More space needed: A wheel works best in a dedicated area where splashes and clay water can be managed safely.
What hand-building is like for a beginner
Hand-building means shaping clay without a wheel. The most common beginner methods are pinch pots, coils, and slabs. You can press, roll, cut, join, texture, and carve clay with your hands and simple tools. For many beginners, hand-building feels less intimidating because you can slow down and adjust the piece as you work.
Hand-building is not a lesser version of pottery. Many professional potters use it because it allows shapes that are difficult or impossible on the wheel. If you want to explore texture, sculptural forms, tiles, trays, wall pieces, or playful organic shapes, hand-building is a strong place to start. For more ideas, see 7 Easy Pottery Techniques for Beginners.
Pros of starting with hand-building
- Lower cost: You can begin with clay, a flat work surface, a few basic tools, and access to firing.
- More forgiving: You can pause, reshape, patch, compress, and refine without the pressure of a spinning wheel.
- Small-space friendly: A table, board, or canvas-covered surface is often enough for practice.
- More shape variety: Hand-building is excellent for boxes, trays, tiles, ornaments, sculptures, wall pockets, slab mugs, and textured pieces.
Cons of starting with hand-building
- Slower for multiples: Making a matching set by hand can take time and careful measuring.
- Less automatic symmetry: If you want very round, even forms, the wheel may be easier once you learn it.
- Joining takes care: Slabs, coils, handles, and attachments need good scoring, slipping, compression, and drying control.
- Surface refinement is manual: Smooth finishes are possible, but they usually require patient compressing, ribbing, scraping, and sanding when appropriate.
Cost and tools
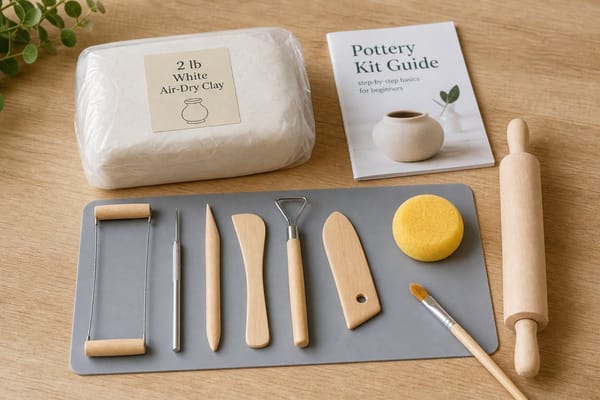
Hand-building is usually the more affordable starting point. A beginner can do a lot with clay, a rolling pin or slab roller access, a sponge, a needle tool, a wooden rib, a small knife, a wire cutter, and a board or canvas surface. You can buy a starter set or make some simple tools yourself. For a practical overview, see Best Pottery Tools for Beginners.
Wheel throwing costs more because the wheel is a major piece of equipment. You may also need bats, trimming tools, splash pans, a stool, shelves for drying, and a cleaning setup. If you are buying a wheel for the first time, consider durability, speed control, motor strength, noise, weight, and whether replacement parts are available. This guide can help: What To Look For When Buying a Pottery Wheel.
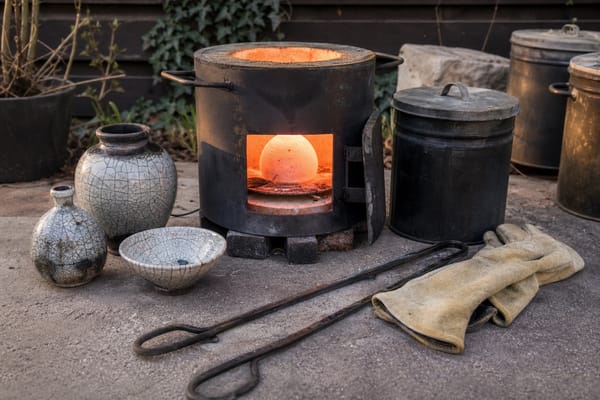
For either method, remember that clay must be fired to become durable ceramic. If you do not own a kiln, check local studios, community centers, schools, or pottery shops for firing services before making lots of work at home.
Learning curve
Hand-building usually gives beginners a faster sense of success. You can make a pinch pot, small tray, tile, or simple sculpture in a first session. The main skills are controlling moisture, joining clay securely, compressing edges, and drying pieces slowly enough to prevent cracking.
Wheel throwing often takes more repetition before it feels natural. Your first goal is not a perfect mug. It is learning how centered clay feels, how much water to use, how to open the form without pushing through the bottom, and how to pull up walls without collapsing them. A class or studio session is especially helpful because a teacher can correct hand position quickly.
Space, mess, and cleanup
Hand-building can be done in a small home setup if you protect the work surface and manage dust carefully. Keep clay scraps contained, wipe surfaces with a damp sponge, and avoid sweeping dry clay dust into the air. Clay dust is not something you want to breathe.
A wheel area needs more planning. Throwing creates slurry, splashes, and buckets of clay water. Never pour clay-heavy water down a household drain if you can avoid it, because clay can settle and clog plumbing. Let clay water settle, pour off clearer water, and dispose of the sediment according to your local setup or studio rules.
Best first projects
Good first wheel projects
- Small bowls
- Straight-sided cylinders for practice
- Simple cups without handles
- Small planters with drainage holes added at the right stage
- Bud vases after you can control cylinder height and shape
Good first hand-building projects
- Pinch pots
- Coil bowls
- Slab trays
- Tiles or test tiles for texture and glaze
- Simple ornaments, spoon rests, and small dishes
- Slab-built mugs after you practice joining seams and handles
Which should you choose?
Choose the pottery wheel first if you are most excited about round functional pieces, especially bowls, mugs, and vases. It is also a good fit if you like repeated practice, technical challenges, and visible skill improvement over time. If possible, try the wheel in a class before buying one for home.
Choose hand-building first if you want the most accessible start, have limited space, or are more interested in texture, sculpture, trays, tiles, and relaxed experimenting. It is also a smart option for families, mixed-age groups, or anyone who wants to explore clay without investing in equipment right away.
Choose both if you can. Many potters combine methods, such as throwing a bowl and adding hand-built handles, feet, sprigs, or sculptural details. Understanding both approaches makes you more flexible and helps you solve problems as your projects become more ambitious. To see where both methods fit into the larger process, read How Pottery Is Made.
A simple beginner recommendation
If you are learning at home on a budget, start with hand-building and take a wheel class before buying equipment. If you already have access to a studio wheel, try a few guided wheel sessions while also practicing hand-building between classes. The best method is not the one that looks most impressive online. It is the one that keeps you practicing, learning safely, and enjoying the process.