Your Guide to Pottery for Beginners
A beginner-friendly pottery guide covering clay, starter tools, wheel throwing, hand building, glazing, firing, and what to buy before you start.
Pottery has been part of human life for thousands of years, and it is still one of the most approachable craft hobbies to explore today. If you are deciding where to begin, this guide focuses on the basics: clay, starter tools, wheels, firing, and a few practical next steps.
Disclosure: This post may contain affiliate links. If you buy through these links, PotteryKey may earn a commission at no extra cost to you. As an Amazon Associate, PotteryKey earns from qualifying purchases.
The Amazon links below are category searches, so you can compare current listings and choose the size, material, and price point that fits your setup.
If you are still deciding between wheel throwing and hand building, our pottery wheel vs hand-building pros and cons for beginners guide is a useful companion read.
The 6 Starter Pottery Items for Beginners
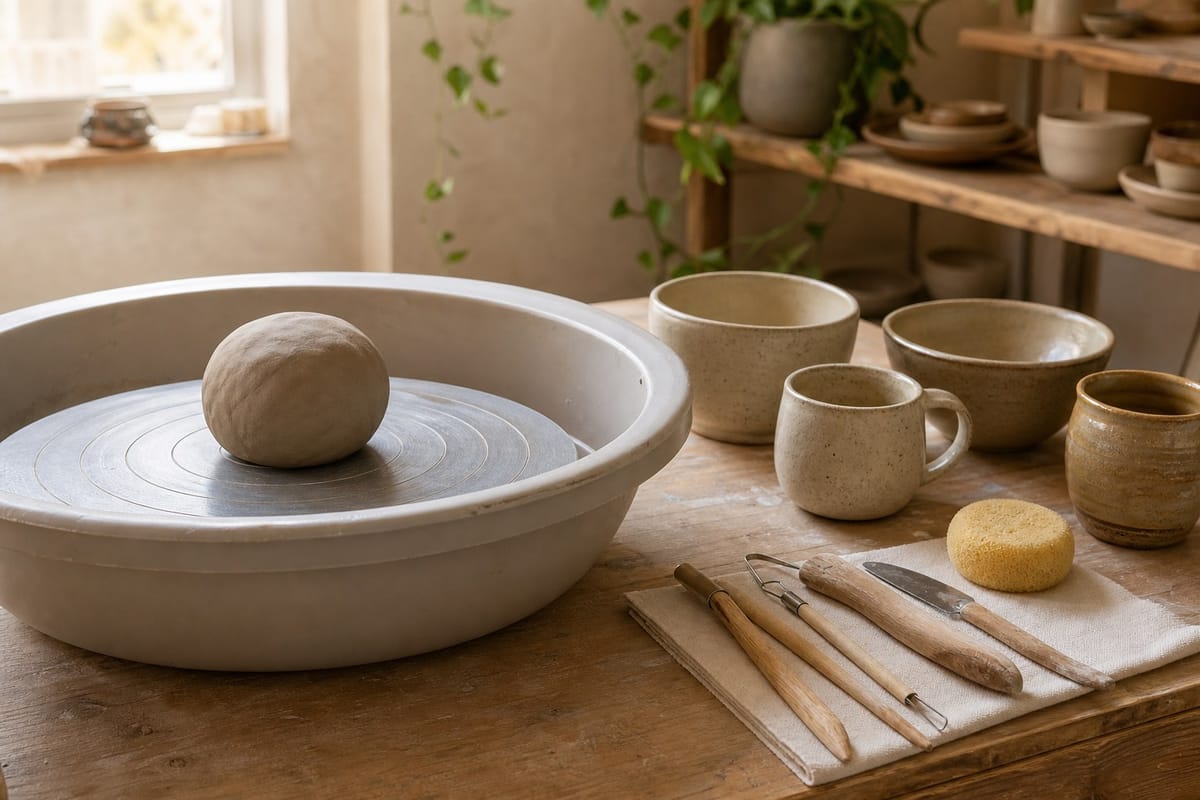
As a beginner, it helps to start with a small, practical setup rather than buying everything at once. The six categories below cover the most common starting points.
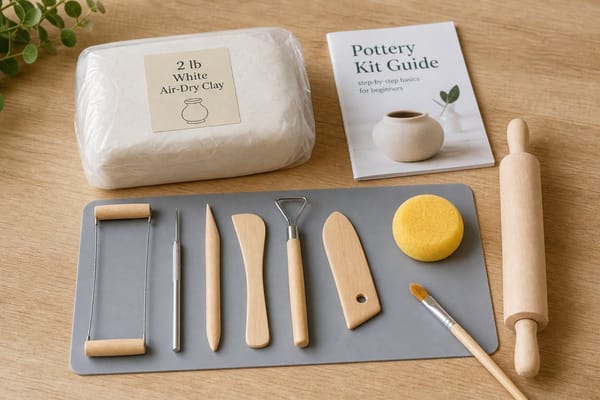
1. Low-Fire Pottery Clay
For most beginners, a low-fire clay body such as earthenware is a sensible place to start. It is usually easier to work with than more demanding clays, and it fires at lower temperatures than stoneware or porcelain.
If you are practicing at home, remember that air-dry clay is not the same as kiln-fired pottery. It can be useful for practice pieces and decoration, but it is not a substitute for fired work when you want a more durable finish.
- Pros
- Usually easier for beginners to handle
- Good for hand building and simple wheel practice
- Works well for early sculpting experiments
- Typically fires at lower temperatures
- Often more budget-friendly than many other clay bodies
- Cons
- Finished pieces may be more limited in durability than higher-fired ware
- Not every low-fire piece is suited to every functional use
Search Amazon for low-fire pottery clay
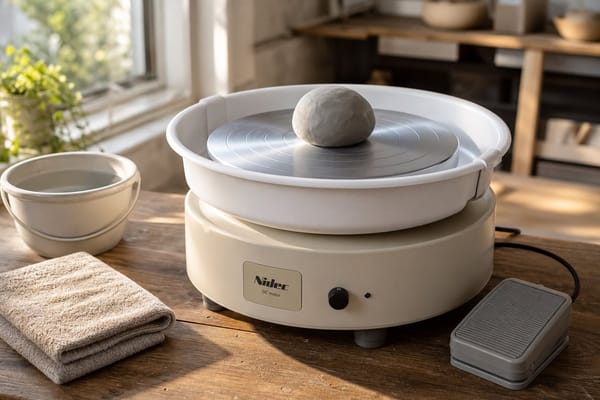
2. Pottery Wheel
A manual pottery wheel or turntable can be a good low-cost way to practice centering, trimming, and small forms before moving to a larger setup. If you want to compare wheel features, see our what to look for when buying a pottery wheel for the first time guide.
- Pros
- Usually less expensive than an electric wheel
- Can help you practice control and form on smaller pieces
- Often portable and easy to store
- Quiet and simple to use
- Cons
- Requires more manual effort to keep speed steady
- May not feel as convenient for longer throwing sessions
Search Amazon for pottery wheels
3. Electric Pottery Wheel
If you plan to throw often, an electric wheel may make practice more consistent. For beginners, the main things to compare are stable speed control, wheel size, ease of cleaning, and whether the wheel fits your workspace.
It is less about finding a perfect first wheel and more about finding one that lets you practice comfortably and regularly.
- Pros
- More consistent speed than a manual wheel
- Helpful if you want to practice wheel throwing often
- Can make centering and shaping feel more repeatable
- Good option if you have a dedicated workspace
- Cons
- Usually costs more than a manual wheel
- May take more space
- Some models may be noisy or harder to move
Search Amazon for electric pottery wheels
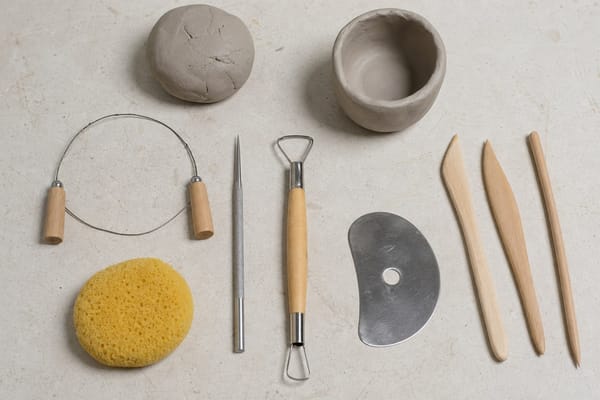
4. Pottery Tool Set
A basic tool set usually covers the essentials for shaping, smoothing, trimming, and moving clay. If you want a checklist before you buy, see our best pottery tools for beginners guide.
For most beginners, a practical tool set does not need to be large. A wire cutter, needle tool, rib, sponge, trimming tool, and a few shaping tools can go a long way.
- Pros
- Covers several everyday tasks in one purchase
- Helpful for both wheel throwing and hand building
- Can reduce the need to buy tools one by one
- Good way to learn which tools you use most
- Cons
- Some sets include tools you may not use right away
- Quality can vary, so it is worth checking materials and reviews
Search Amazon for pottery tool sets
5. Pottery Sculpting Tools
Sculpting tools are especially useful if you prefer hand building, carving, or refining details. They are also helpful for trimming edges, adding texture, and cleaning up small forms.
You do not need a fancy set to get started. The main goal is to have a few tools that feel comfortable in your hand and suit the kind of pieces you want to make.
- Pros
- Useful for carving, shaping, and surface detail
- Helpful for pinch pots, coils, and small sculptural work
- Can support more precise finishing work
- Easy to add to a basic starter setup
- Cons
- Some tools are more specialized than others
- You may not need a large set at the very beginning
Search Amazon for pottery sculpting tools
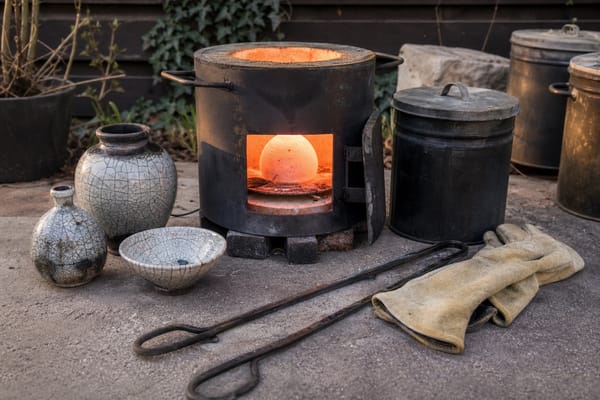
6. Small Electric Kiln
A kiln is useful for firing finished pottery, but it is not required on day one. Many beginners learn at a studio, school, or community studio before buying their own kiln. If you want to compare firing options, our best pottery firing techniques guide is a helpful place to start.
If you do want to build a home setup later, a small electric kiln can be a practical option to compare. The key questions are size, power requirements, venting, and whether the kiln fits the kind of work you want to make.
- Pros
- Lets you fire work at home if you have the space and setup
- Useful for artists who want more control over their own workflow
- Can support a wider range of firing projects over time
- Cons
- Usually the most expensive item on this list
- Requires careful space planning and safety awareness
- Not necessary for getting started with pottery
Search Amazon for small electric kilns
Why Pottery Is a Rewarding Hobby
Pottery offers a mix of creativity, repetition, and problem-solving. Many people enjoy it because the process is hands-on and the results improve with practice.
- It gives you a creative outlet that uses your hands as much as your ideas
- It can be calming to repeat simple, focused movements
- It teaches patience because clay often rewards steady progress over speed
- It gives you visible feedback as your skills improve over time
If you want a broader look at the hobby side of things, see our article on the benefits of pottery for mental health.
Pottery Techniques You Could Try
If you want to keep learning, start with a few simple methods and compare how they feel. Our 7 easy pottery techniques for beginners article is a good next step.
Hand Building
Hand building is the broad term for making pottery without a wheel. It gives you direct contact with the clay and is often the easiest place to begin if you want a slower, more forgiving learning curve.
It can still be challenging, though, because clay responds to pressure, moisture, and timing. Even simple forms take practice.
Pinching
Pinching is one of the simplest hand-building methods. It is often one of the first techniques beginners try because it helps you get used to the feel of the clay and how it changes under your fingers.
Wheel Throwing
Wheel throwing uses a pottery wheel to shape clay from the moment it is centered until the form is complete. Many beginners are drawn to it because it can produce smooth, even forms once the basics start to click.
If you are still deciding whether the wheel or hand building makes more sense for you, our pottery wheel vs hand-building pros and cons for beginners guide breaks down the tradeoffs.
Pottery Tips for Beginners
A few small habits can make your first projects easier to manage.
- Find a suitable place. Choose a space with easy-to-clean floors, a stable work surface, access to water, and room for drying pieces.
- Start with the right clay and glaze. Match your materials to the firing method you plan to use, or keep things simple until you build more experience.
- Keep your tools simple. You do not need a large kit on day one. A few basic tools are often enough to learn the fundamentals.
- Use a canvas or cloth surface. This can help keep clay from sticking to your work area.
- Expect shrinkage. Clay changes size as it dries and fires, so a little trial and error is normal.
- Practice one skill at a time. Focus on centering, pinching, or basic shaping before trying to do everything at once.
FAQ
What are pyrometric cones?
Pyrometric cones are small indicators that help show heat work during firing. They are useful for learning how a firing behaves, especially when you are working with different clay bodies or glaze schedules.
What is high-fire pottery?
High-fire pottery refers to clay that is fired at a higher temperature range than low-fire clay. It is often chosen for durability, but the right choice depends on your project and glaze system.
What is low-fire pottery?
Low-fire pottery is fired at a lower temperature range. It can be a practical starting point for beginners because it is often easier to handle and quicker to fire, depending on the studio setup.
Can you make pottery in a household oven?
Not in the traditional sense. A household oven does not reach the temperatures needed for standard fired pottery.
Can you fire your pottery without a kiln?
There are alternative firing methods, but they are not the same as standard kiln firing. If you want durable work, a kiln or access to a studio kiln is the usual route.
Can you make a living as a potter?
It is possible, but income depends on skill, pricing, production time, marketing, and business planning. Many potters combine sales, teaching, commissions, or studio work.
Is pottery clay eco-friendly?
Clay is a natural material, but the overall impact depends on sourcing, glaze chemistry, firing energy, and waste. Sustainable practice matters as much as the raw material.
Wrap Up
Pottery can be a satisfying hobby whether you want to make simple decorative pieces, learn new hand-building skills, or eventually move into wheel throwing and firing. Start with a few practical tools, choose a clay body that matches your setup, and give yourself time to learn.
If you want to keep building from here, compare your first tools, wheels, and firing options one by one, then choose the setup that feels realistic for your space, budget, and pace of practice.